It goes without saying that your website’s performance hinges on its content. Having invested resources into your website, you want to be certain it delivers the right customer experience to your visitors and, most of all, that it yields expected business results. You bring UX and web designers on board, perform A/B testing, and maybe even splash out on eye tracking. Then you regularly count page views logged by your web analytics tool. Yet, parts of the website still remain beyond your control. Given the amount of effort you’ve made, wouldn’t it be nice to measure the whole thing? What you can’t measure, you can’t manage, as the saying goes.
In this blog post we want to introduce Content Tracking in Piwik PRO – a feature that puts you in control of every piece of content on your website.
What Exactly is Content Tracking?
As we’ve mentioned, Content Tracking is a feature of Piwik PRO web analytics. It enables you to measure the performance of individual pieces of content on your website or in mobile apps. It tracks ad banners, partials and popups, helping you detect top performers. It counts numbers of impressions and clicks, as well as click-through rates of particular elements.
Do I Need It?
Yes, you do. Content tracking gives you insights into the performance of individual elements of your website or app that don’t generate page views and that aren’t tracked otherwise. Tracking these bits of content effectively can give you precious business clues such as which visitors are potential leads and how to get them to accomplish your website’s micro and macro goals. By measuring otherwise untracked blocks of content you maximize the control you have over your website and, ultimately, your business.
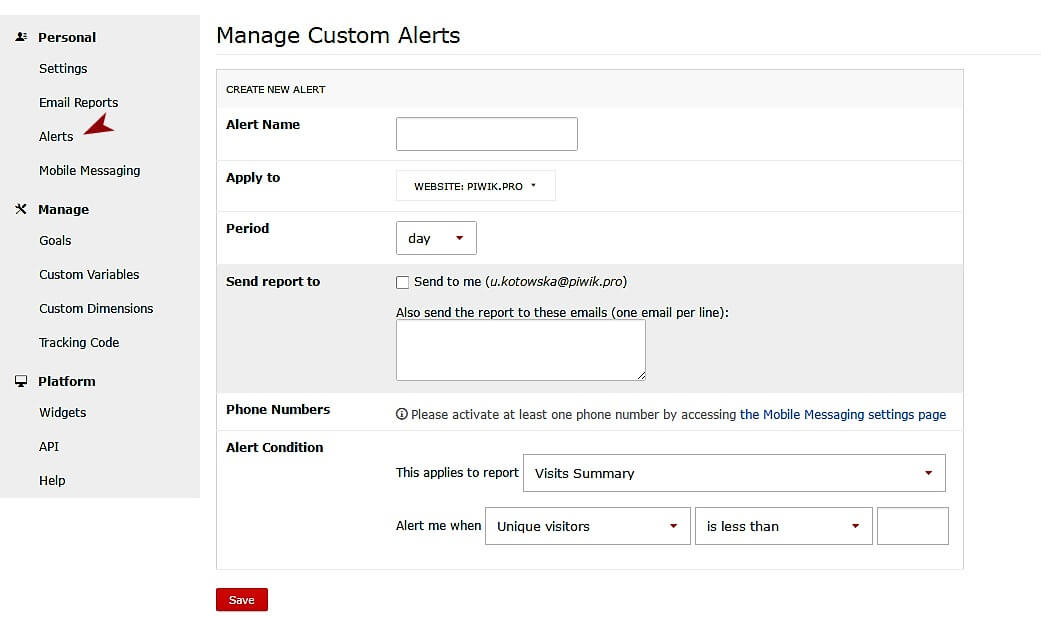
Tracking more content doesn’t necessarily mean more trouble when your hands are full anyway. Piwik PRO offers an option to set alerts (see Personal Settings), so you can focus on other business activities. The tool will notify you of any impressions or interactions you’ve singled out for tracking.
A great example of when content tracking comes in handy is measuring the effectiveness of popups. We’ll discuss it a little more later on in this post. They’ll serve as a background for explaining the implementation of this functionality.
Optimize Piwik’s Performance Issues: A Free Guide
Learn how to boost Piwik’s reporting speed and strengthen web analytics data security:
Terminology
However, first things first – let’s clear up a few terms so we can all be on the same page:
| If I say: | I mean: |
|---|---|
| Content block | a container which consists of a content name, piece and a target |
| Content name | represents a content block, is visible in reports; one name may refer to different content pieces |
| Content piece | the actual content that is displayed (e.g. a path to a video, image, podcast, or a text) |
| Content impression | a content block displayed on a page, such as a banner or an ad (above or below the fold, visible or encrypted) |
| Content interaction | any instance of interacting with a content block, typically a “click” on it |
Why Track Popups
Imagine you have configured your popup to appear at a certain scroll position. The default settings of Piwik PRO only tell you only how many times the page with a popup was uploaded. You are still missing information on how many people have seen and interacted with the popup itself. Wouldn’t this be useful data for your business?
Kicking Off Content Tracking
Now we’re ready to dig deeper into implementing content tracking with Piwik PRO. This can be done in several different ways. You can: introduce the changes in your website code manually, use JavaScript API, modify the website’s tracking code with HTML tags or CSS classes, or use our Piwik PRO Tag Manager. We’ve already discussed content tracking via tag manager in a separate post (see the link above). Now we want to focus on using HTML tags and CSS classes for that purpose.
It’ll be most convenient for everybody if we explain the implementation using an example. Let’s see how we’ve implemented tracking of our Tag Manager Vendor Comparison popup:
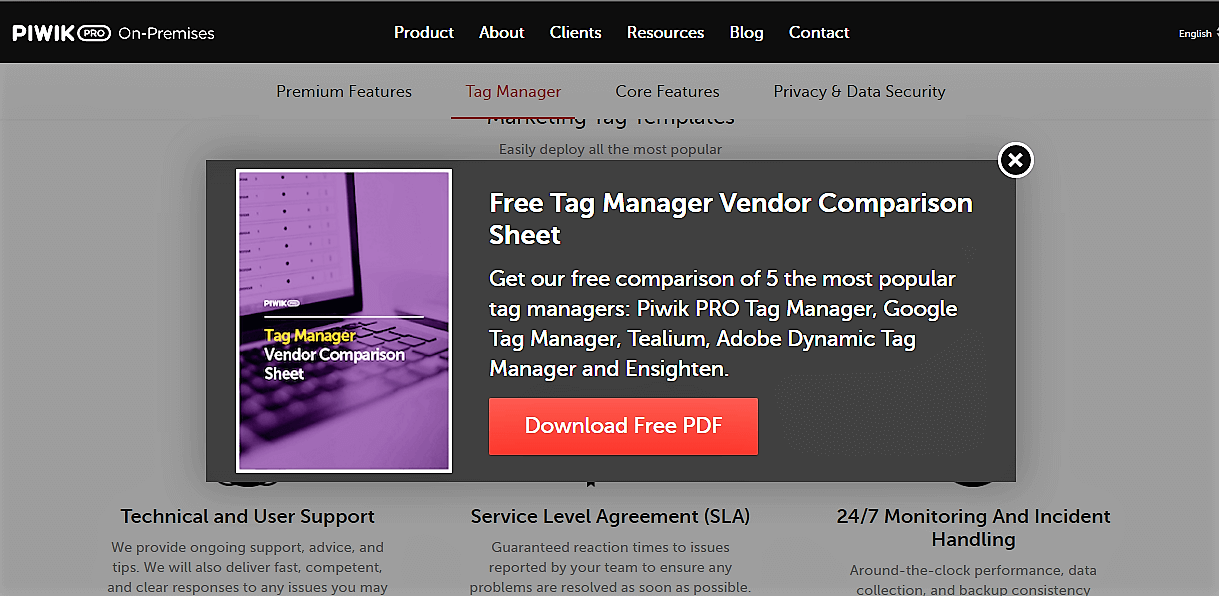
Here is what the code behind the popup looked like before changes:
To be able to track anything, you first need to initialize a tracker and then tag HTML attributes (or CSS classes) to declare them content blocks. Introduce them into your website’s HTML head section – duck soup, really, as all you need is access to your website’s source code (such as through your CMS). Here is a step-by-step guide on how to go about it:
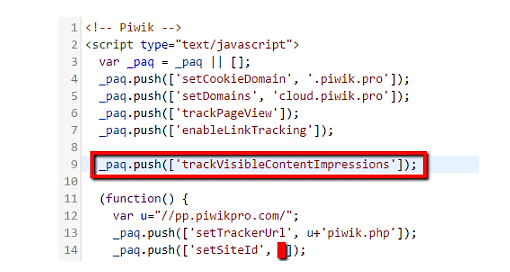
1. First of all, log the entire content by either using a tag manager to initialize the tracker or by adding it manually to Piwik PRO JavaScript tracking code on all pages (we recommend using the tag manager to keep things simple):
_paq.push(['trackAllContentImpressions'];to log all content, or
_paq.push(['trackVisiblelContentImpressions'];to log the viewable content only:
2. Declare a content block using an HTML attribute [data-track-content] (see the small red arrow in the picture below) or a CSS class piwikTrackContent. (Note that you do not need to ascribe any value to the attribute.)
3. Declare content pieces – you need to define their names: [data-content-name=””] (see the yellow arrow in the picture below).
By tracking content with HTML attributes or CSS classes you can also choose whether or not you want to track just the viewable bits of content or all the content on a page. By viewable content I mean what is above the fold or not encrypted. If you set Piwik PRO to track all content, it will log all the uploaded content – regardless of whether your visitor has actually seen it or not. This is probably of little value when you consider that tracking only visible blocks of content is helpful from the business standpoint, as it gives you more actionable feedback.
As we’ve already mentioned earlier in this post, apart from tracking content impressions, you can also track visitors’ interactions with it. Piwik PRO does this automatically – there is no need to alter the code on your side.
To sum up, content tracking boils down to:
- Implementing the trackers within the main Piwik PRO code using either
_paq.push(['trackVisibleContentImpressions']
or_paq.push(['trackAllContentImpressions']
and then:
- selecting the div whose content you want to track with
<strong>data-track-content </strong> - adding an HTML attribute naming the content
<strong> data-content-name="" </strong> - specifying the piece of content to track using the HTML attribute
<strong>data-content-piece </strong>
Instead of using HTML attributes, you can of course use CSS classes:
piwikTrackContent– to define the content blockpiwikContentPiece– to define the content piece
However, we recommend using HTML attributes as they allow you to set specific values for content name, content piece and content target.
Get the Most of Reporting
Let’s take a look at the easter eggs you can find in Piwik PRO reports. To read the Content Tracking reports there, go to the Actions section in the main menu and then click on the Contents category. You’ll see a two-dimensional table. On the surface you’ll see a list of the content you have created and the number of times each piece of content has been displayed, as well as the information on whether or not users are interacting with it and interaction rates. Once you click on a given content name, the list of content pieces unfolds:
The reports also contain a row evolution graph which lets you track trends in the performance of a given content block as well as analyse historical data to draw conclusions and optimize future marketing activities.
You may also distill your findings by focusing on a specific segment of visitors to single out the most promising leads. Let me clarify:
As we’ve already mentioned, our secret plan in placing the popup on the Piwik PRO Tag Manager website page is to discover who might be interested in learning more about the product and starting cooperation with us. From experience we know that the visitors who are the most likely to show a real interest in our product are those who have already engaged with other pages of the website. To maximize the efficiency of our visitors’ time we’ve created a segment specifying which visitors are potentially interested in interacting with us to discuss the benefits of Piwik PRO Tag Manager. This way we have a more in-depth understanding of how the popup performs.
This Custom Segmentation feature proves useful especially when tracking well-performing content. It helps you single out the most promising leads so your sales team can engage in only desired interactions.
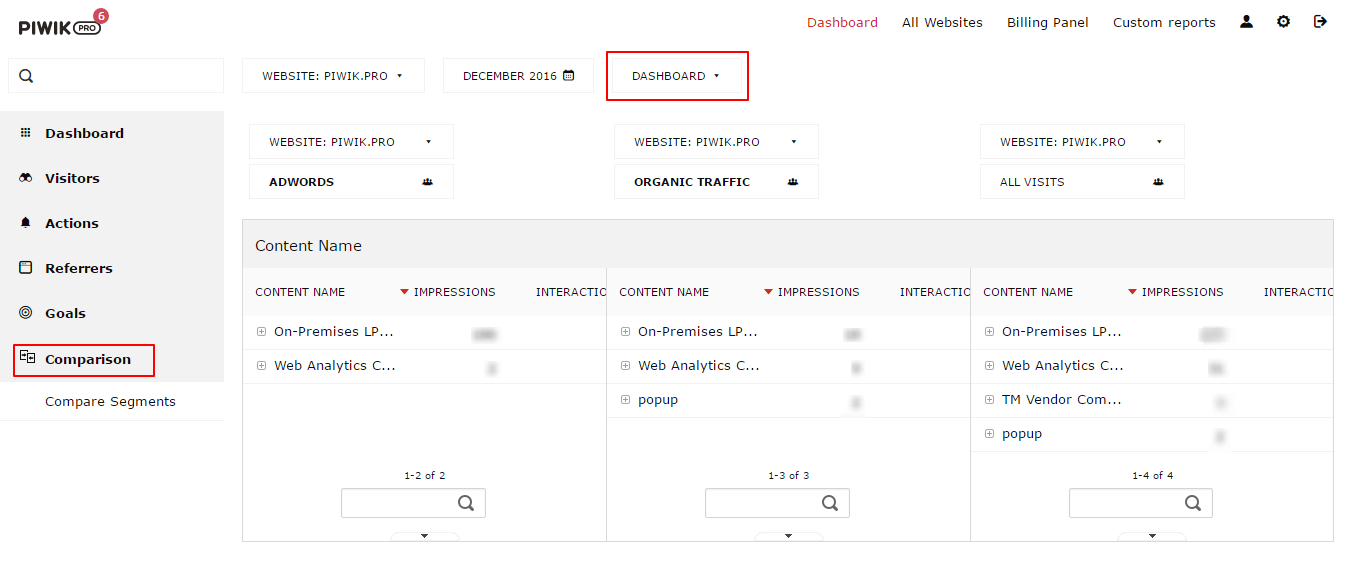
Piwik PRO also lets you see things from a broader perspective. You can easily juxtapose the most relevant reports using the Comparison Dashboard. You can compare impressions and interactions for up to 3 segments (Learn more: Comparison Dashboard User Guide). To do so, click on Comparison at the bottom of the Piwik PRO menu, then Compare Segments. Once you’ve done that, from the Dashboard drop-down menu at the top, choose Actions and then Content Name:
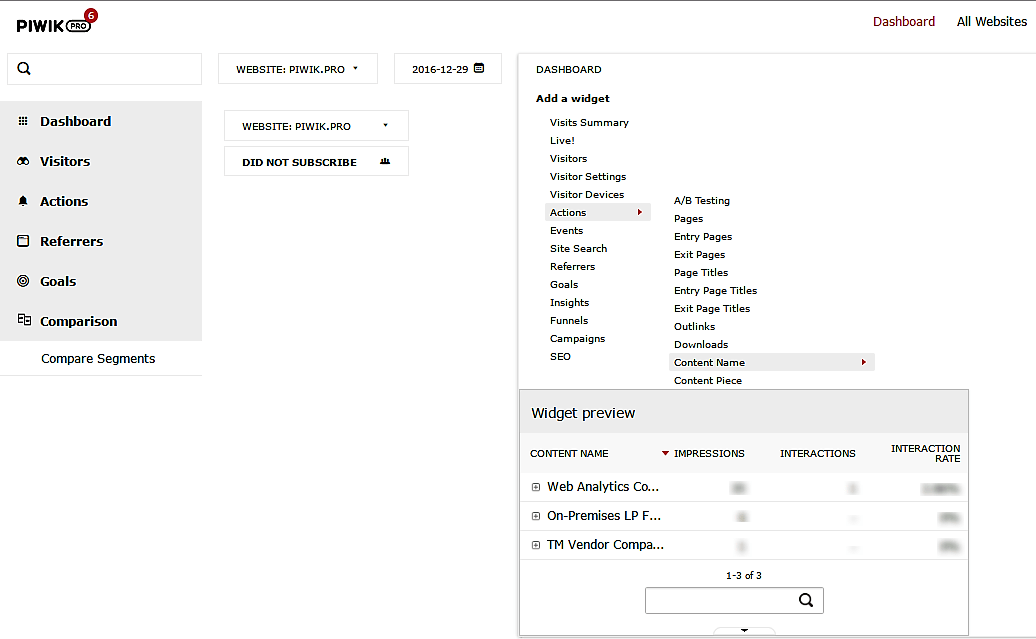
Here is what our Comparison Dashboard looks like:
Optimize Piwik’s Performance Issues: A Free Guide
Learn how to boost Piwik’s reporting speed and strengthen web analytics data security: