Whether it’s your website, your analytics tool, or your marketing platform, they all hold valuable information – your data. And that data demands special treatment, namely security. But protecting data is about more than just secure storage and safeguarded servers. It also means managing access, making decisions about who can see or edit certain reports or a website. That’s why it’s vital to have the right user management system in place.
Piwik PRO makes it easy to set permissions for viewing and working in particular areas of your instance. We’ll walk you through all the necessary steps of the user management process.
User Management in Piwik PRO
User management is the capacity of administrators to manage user accounts during their life cycle. Those accounts might be tied to different IT systems, devices, applications, networks and services. Most importantly, UM is an essential element of security for any organization. It should be your central focus when preparing your directory service.
User management helps organizations handle what particular users can see and who is granted rights for editing data, websites, etc. For instance, members of the sales team don’t necessarily need access to all the reports for the marketing team. Your data protection officer should be able to get to data subject requests, but changing tag configurations might not be required for this role.
What’s more, not everyone should be allowed to edit and publish changes. You need to follow a set review process before certain information appears publicly. This is a must for ensuring the overall protection and safety of resources in your care.
Finally, the settings in Piwik PRO User Management enable you to address these requirements and apply more granular access, for a single user or whole user groups. Not only can you make adjustments at the general level, but you can also authorize access to individual websites on your instance or product modules.
Manage access of single users
As we’ve already mentioned, Piwik PRO makes it simple for you to add and change authorizations for individuals.
Adding a new user
You can add as many users as you wish with almost no hassle. First, sign in to the Piwik PRO Analytics Suite. Then go to the Administration panel. Under the Users tab you have a list of all users, and at the end is the Add new button.

Next, enter the new user’s email address and set a password.

Voila! The new account is ready.
Setting up permissions
Now it’s time to specify whether this user will be an Owner with full administrative control or just a regular User.
This means you need to edit the user’s account. Here’s how:

If the Owner privilege option is disabled, you will see this particular user under the permission tab in the website settings. Otherwise, you don’t need to change anything. An owner user has full rights over the instance and there’s no need to assign additional rights to a given website or module.

COMPARISON
The comparison of 10 web and app analytics platforms
Learn the key differences between Piwik PRO Enterprise, Google Analytics 4, Matomo Cloud, Adobe Analytics, AT Internet, Countly Enterprise, Mixpanel Enterprise, Amplitude Enterprise, Snowplow Enterprise, and Heap Premier.
Editing permissions at the website level
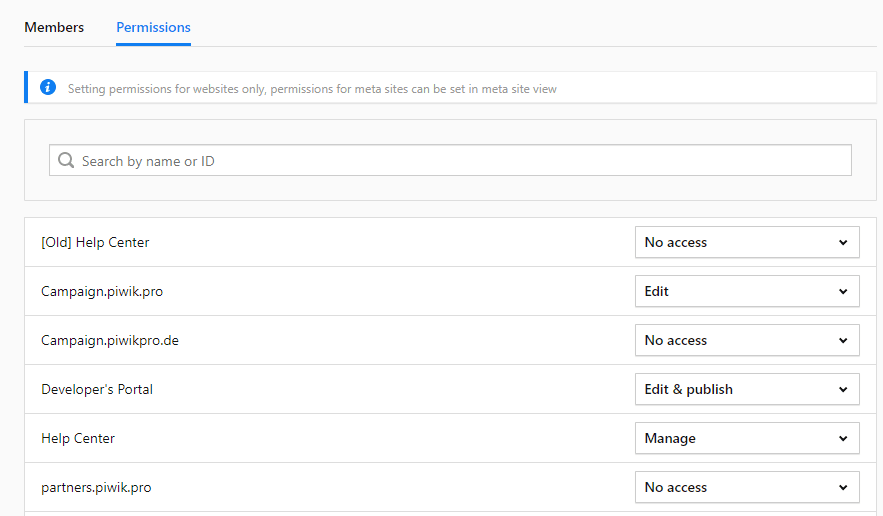
Non-owner users have no access at all when you first add them to your instance. To grant them a specific permission, go to the website settings page and click on the Permissions page/tab.

Then, select the particular user from the drop-down list and set the desired permission:

Who can do what
Different authorizations give very different permissions. This can be confusing. So, to make it clear and help you choose the right one, we’ve made the following matrix:

Keep in mind that you need to establish separate permissions for each website. Moreover, if your team uses meta sites, you’ll be able to set authorizations for accounts with a user level independently from access rights to apps and websites.
This ensures better control over every site so you can determine which area a particular user is allowed to enter. You can edit these settings whenever necessary.
To learn more about this topic, check out this detailed article in our Help center.
Take advantage of User Groups
If you’ve got a lot of employees in your organization, creating a User Group comes in handy.
This is a convenient way to grant admission to your sites to multiple users at a stroke. You can easily allow your analytics team to edit & publish changes, or restrict your sales department to view only access. The final configuration depends on particular organizational rules and internal requirements.
Note that only an owner user can control a given User Group. That ensures only authorized people can make changes across the instance and websites.
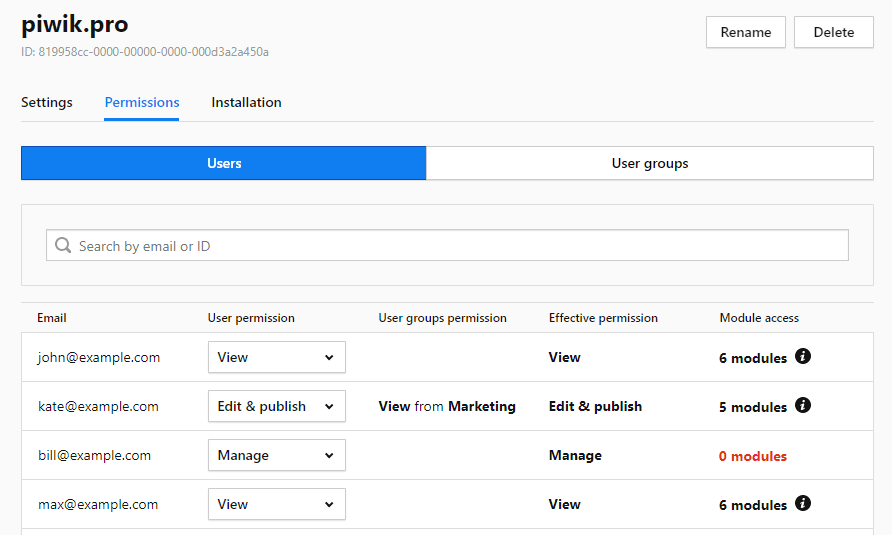
Here’s an example of the setup:

For step-by-step instructions on adding and coordinating User Groups, check out this article in our Help center.
Grant authorization for Piwik PRO Modules
When you create a new account for one of your staff members, by default they can use all modules in Piwik PRO, namely:
and the Administration panel.
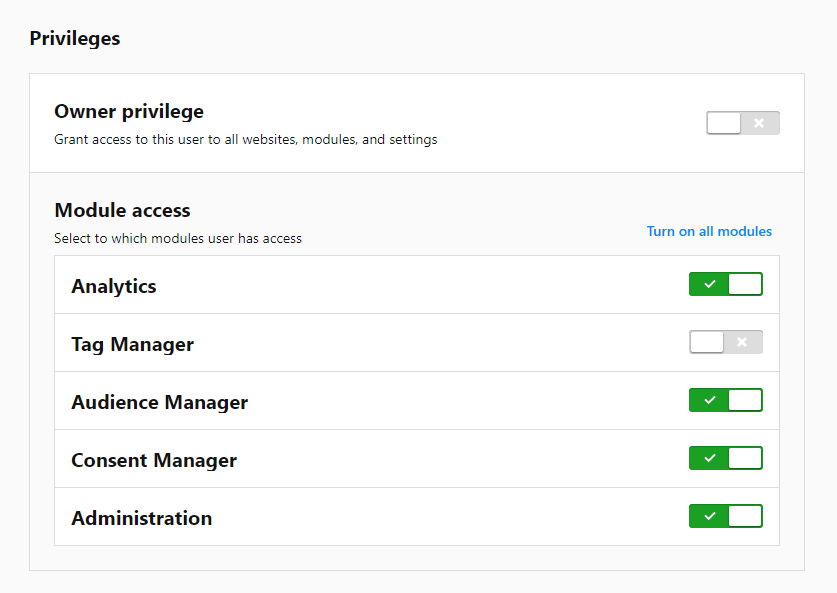
You can change, restrict or expand access to certain modules at any time. Remember that this has to be done by an owner user account, just like with User Groups.
This is how it looks in practice:

What’s more, you can review existing website permissions for all users, both individually or in a group.

Read this article in our Help center for more details.
Report visibility options
Besides default permissions, you can decide to show or hide certain reports that could give unauthorized people access to sensitive information. Piwik PRO Analytics lets you set visibility options for particular reports and users.
This is pretty simple. When creating and naming a new report, choose from two visibility options:

This enables you to configure a private report that only you can see, or you can present it to users that have access to the particular website this report was created for.
For more effective uses of Analytics custom reports, check out our other blog posts:
Conclusion
It’s clear to see: user management in Piwik PRO is a piece of cake. What’s more, it provides you with the flexibility to manage user accounts and grant access to the right users. Just a few clicks and you can set up all the necessary permissions to implement safety measures for protecting your data.
That’s all for now. But in case you have any burning questions or doubts, or maybe you would like to see our product in action, just reach out to us!


